
Podigy recommends Reaper as the digital audio workstation of choice for podcast editing. Created by Cockos Inc., this platform offers stability and customization despite its initially intimidating interface. This guide walks through installation, licensing, configuration, and extension setup to get you editing efficiently.
In This Guide
1. Downloading and Installing Reaper
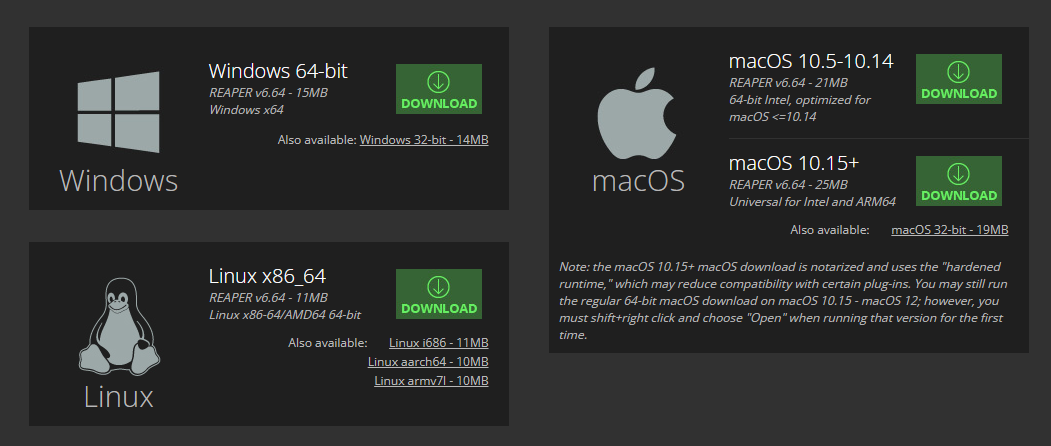
Navigate to Reaper’s download page and select your platform. After downloading the installation executable, proceed through setup with these key settings:
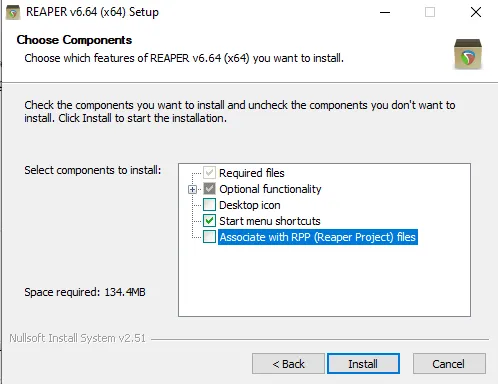
- Install to your default drive (C:\ on PC)
- Leave the portable install checkbox blank
- Select “Associate with RPP (Reaper Project) files”
2. Acquiring a License
Reaper provides a 60-day free trial with full functionality access. After the trial, a one-time license purchase grants perpetual access: $225 for commercial use, or $60 for individuals and businesses under $20K gross revenue.
You’ll receive an alphanumeric key via email—save this in Help > About REAPER under the license tab. Archive the email for future installations.
3. Initial Configuration
Autosave Setup
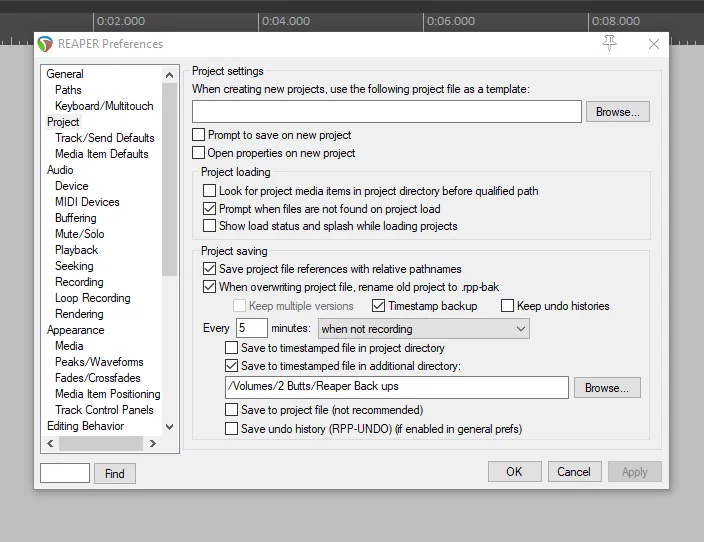
Access Options > Preferences > Projects and enable:
- “Timestamp backup” checkbox
- Autosave interval (5-10 minutes recommended)
- “Save to timestamped file in additional directory”
This creates automatic backups, protecting your work from crashes and power outages.
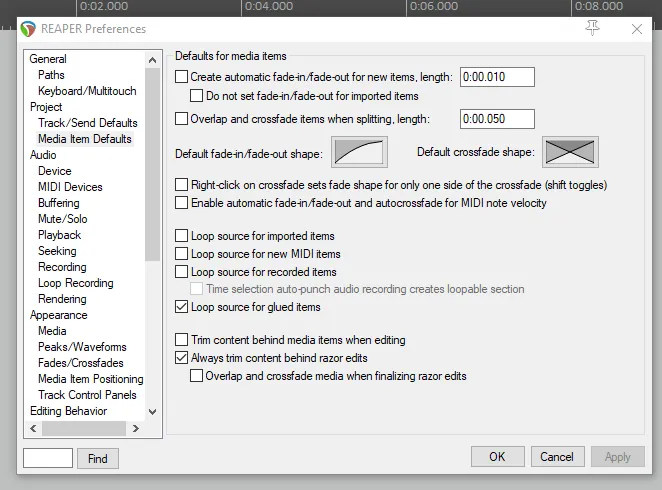
Media Item Defaults
Under the same Projects tab, configure crossfades for smooth edits:
- Leave “Create automatic fade-in/fade-out” unchecked
- Leave “Overlap and crossfade items when splitting” unchecked
- Set adjacent fields to 0:00:010 and 0:00:050 respectively
Audio Device Settings
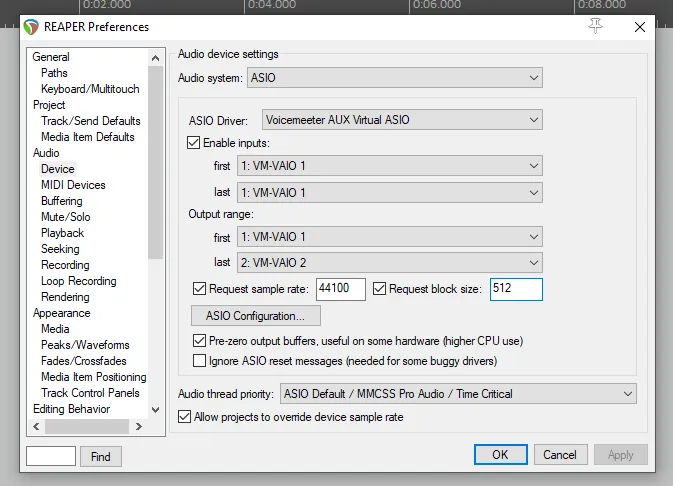
In Audio > Device, set:
| Setting | Value | Reason |
|---|---|---|
| Sample rate | 44100 | Prevents desync and pitch issues |
| Block size | 512 | Balances latency and CPU load |
Mouse Behavior
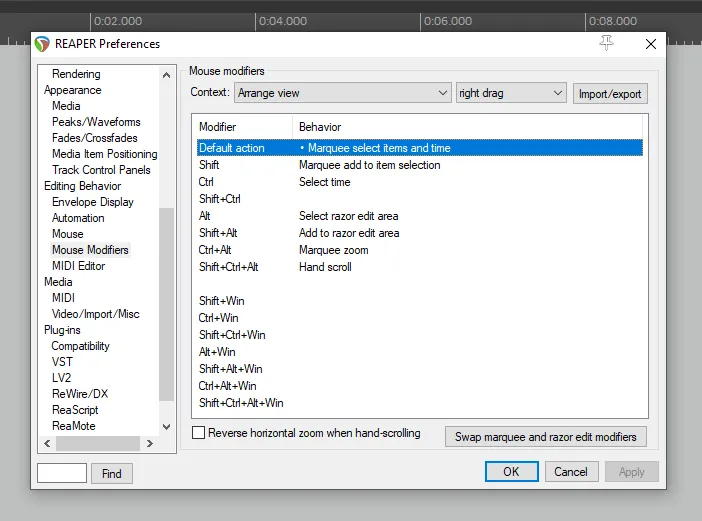
Navigate to Editing Behavior > Mouse Modifiers:
- Select “Arrange view” context
- Choose “right drag”
- Change default action to “Marquee select items” > “Set time selection”
Grid Lines
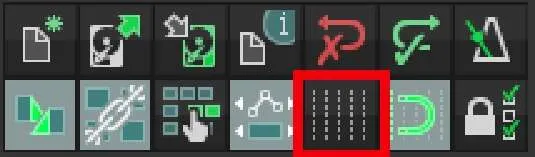
Disable grid lines in the main toolbar (use ALT+G on PC) for finer audio adjustment precision during podcast editing.
4. Installing SWS and ReaPack Extensions
SWS Extension Pack
Download from the official SWS website for your platform. This enables custom action chaining, reducing multiple clicks to single keystrokes—essential when making hundreds of edits per episode.
ReaPack
Install the package manager from reapack.com. Drop the .DLL file into the UserPlugins subdirectory via Actions > Show Reaper resource path. Run Extensions > ReaPack > Synchronize Packages to install hundreds of resources.
XRaym Custom Action
Purchase the “Multiply Selected Items in between all tracks gaps by X percents” script (~$20) for gap adjustment functionality.
5. Setting Up Custom Actions and Scripts
Navigate to Actions > Show action list and create three custom actions:
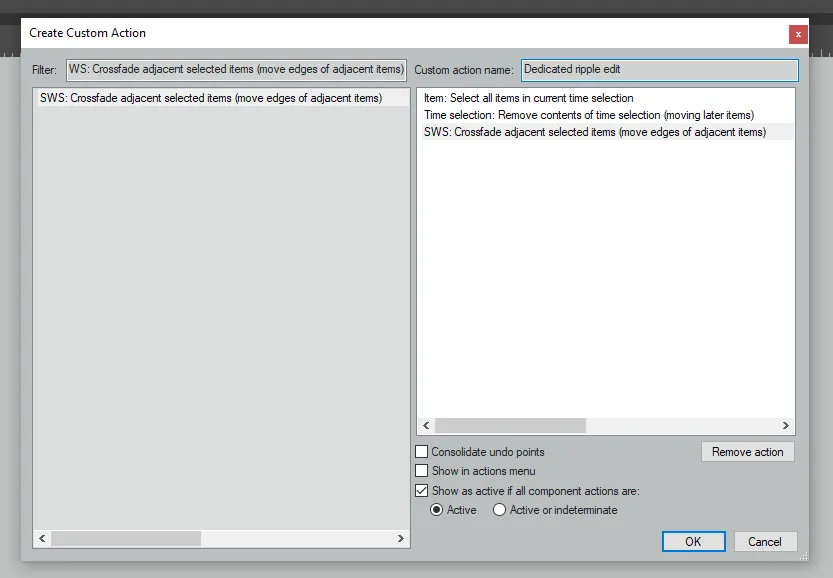
Custom Action 1: “Dedicated ripple edit”
Chain these actions in order:
- “Item: Select all items in current time selection”
- “Time selection: Remove contents of time selection (moving later items)”
- “SWS: Crossfade adjacent selected items (move edges of adjacent items)”
Purpose: Removes highlighted audio across all tracks simultaneously while shifting subsequent audio forward.
Custom Action 2: “Always Delete”
Chain in order:
- “Set ripple editing off”
- “Edit: Cut items/tracks/envelope points (depending on focus) within time selection”
Purpose: Deletes audio from selected tracks without affecting others or auto-advancing remaining content.
Custom Action 3: “Dead air script”
Chain in order:
- “SWS/BR: Normalize loudness of selected items to -23 LUFS”
- “Item: Auto trim/split items (remove silence)…”
- “Script: X-Raym_Multiply selected items in between all tracks gaps by X percents.lua”
- “Item: Crossfade any overlapping items”
Purpose: Handles normalization, silence removal, gap adjustment, and crossfading in one action.
Assigning Keyboard Shortcuts
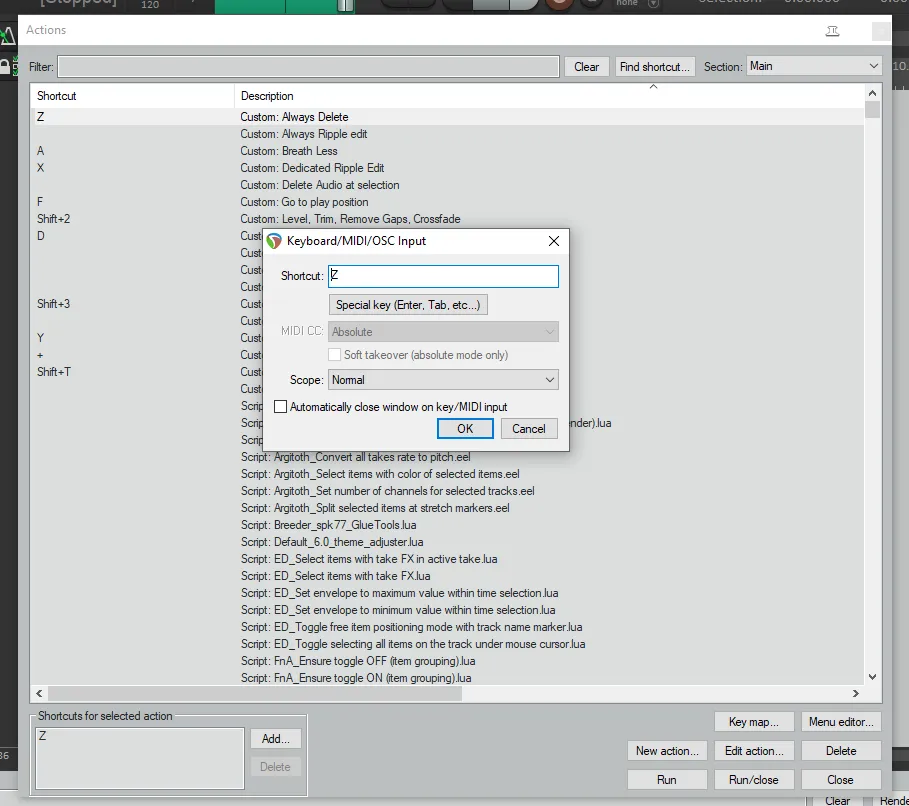
In the Action List window, select each custom action and click “Add…” next to Shortcuts:
| Action | Recommended Shortcut |
|---|---|
| Dedicated ripple edit | X |
| Always delete | Z |
| Dead air script | Shift+2 |
Customize based on your comfort level, ensuring no conflicts with existing actions.
Wrapping Up
After completing these steps, you’ve configured Reaper with essential podcast editing tools and shortcuts. While the setup involves multiple technical steps, the resulting efficiency gains make every future editing session considerably faster and more streamlined. For context on the full editing workflow, see The Complete Guide to Podcast Editing.
Next: Part 2 - Creating a Project in Reaper
Prefer to skip the technical setup? Learn how Podigy handles production so you can focus on content.