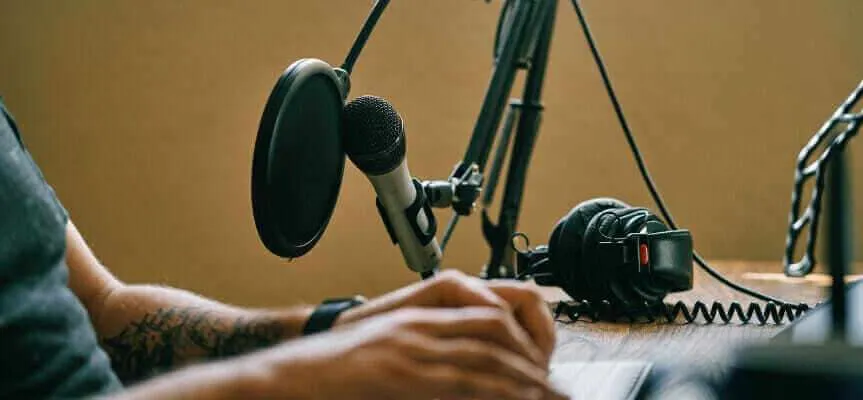
No matter what you do when mixing and mastering, if your initial recording was subpar, the final recording will reflect that. This comprehensive guide covers fundamental podcast recording principles applicable to both Mac and Windows systems. Before you record, make sure you have the right microphone for your setup.
In This Guide
Room Preparation
Before selecting equipment, assess your recording environment. Close your eyes and listen for ambient noise sources: computer fans, HVAC systems, traffic, or construction. Your microphone will capture all these elements, so minimizing consistent background noise is critical for reducing the noise floor.
Managing Reflections
Sound bounces off hard surfaces, creating reflections that degrade voice quality. Record in small, soft spaces filled with sound-absorbing materials like couches, carpets, and curtains. Professional voice actors often use closets for this reason.
Microphone Positioning
Understanding polar patterns helps optimize microphone placement. Most common microphones use cardioid patterns, which reject sound from the sides and rear. Position microphones with their backs facing the noisiest room elements.
Distance Guidelines:
- Maintain approximately thumb-to-pinky distance between mouth and microphone for ideal studio setups
- Closer positioning improves signal-to-noise ratios during casual recording
- Use a pop filter or windscreen to mitigate plosives and sibilance when speaking close
USB Microphones
USB microphones plug directly into computers without additional hardware, making them ideal for:
- Solo podcasters
- Remote interviews
- Budget-conscious beginners
Limitations: USB microphones are less suitable for multi-person in-studio recording due to potential synchronization issues and device recognition problems.
XLR Microphones
XLR connectors, established since the 1950s, require audio interfaces or mobile recording devices to convert analog signals to digital formats. While requiring additional investment, interfaces offer greater flexibility as podcasts grow.
An interface with four XLR inputs typically serves podcasting needs throughout a creator’s career, though adapting multiple microphone types requires careful gain balancing.
Recording Into Your DAW
Initial Setup
- Restart your computer with all recording devices connected
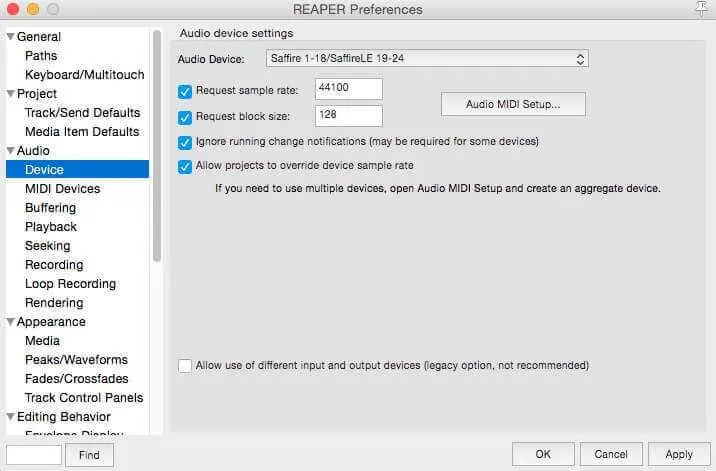
- Open your Digital Audio Workstation and verify audio device settings
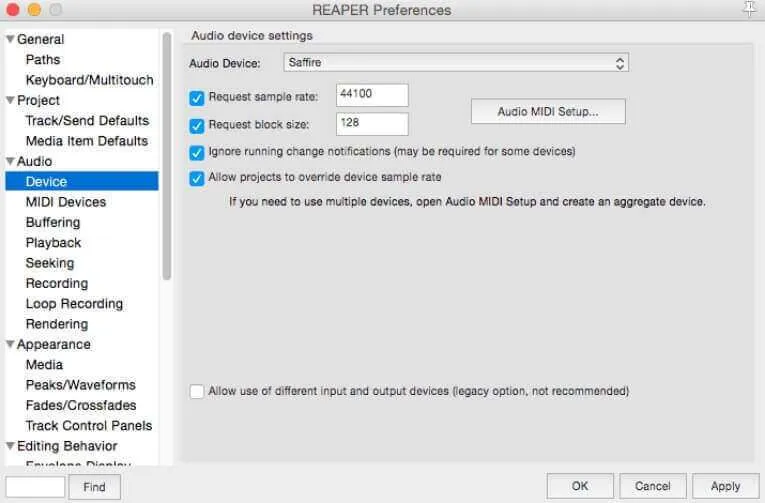
- Set sample rate to 44,100 Hz
- Choose block size based on your needs:
- 128-256 samples for VOIP recordings (minimizes latency)
- 512-1024 samples for solo or co-located recording
Creating and Configuring Tracks
- Create tracks (Cmd+T on Mac, Ctrl+T on Windows)
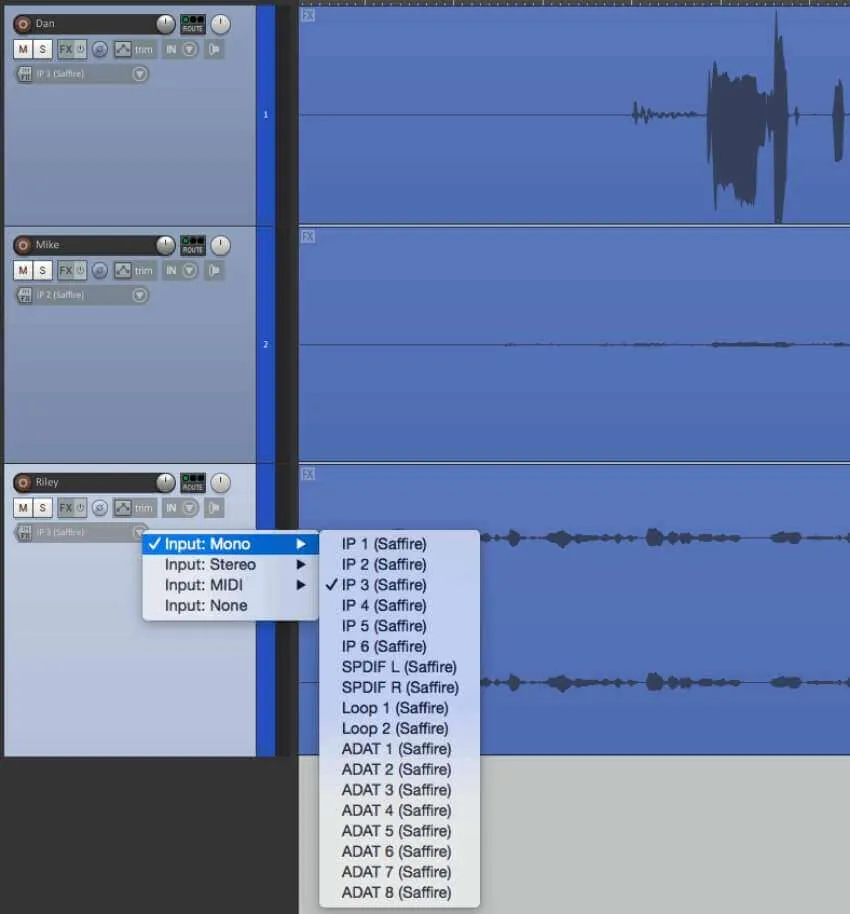
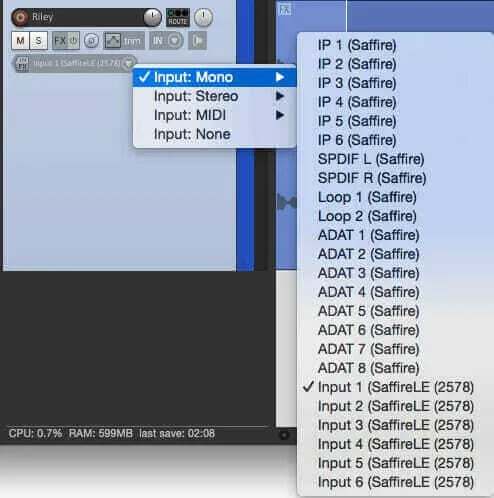
- Select appropriate inputs (mono for XLR interfaces, stereo pairs for certain USB mics)
- Name tracks for easy identification
Testing and Setting Levels
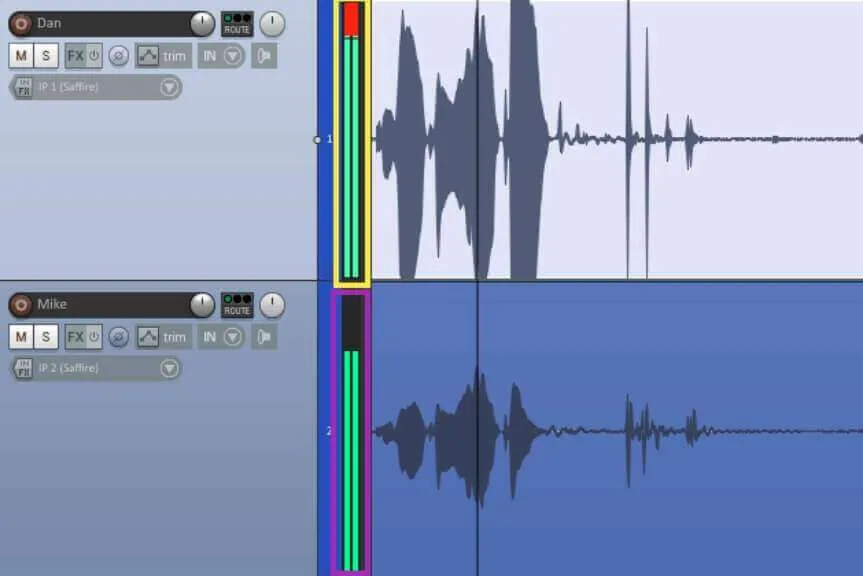
Arm recording and test microphone levels while speaking naturally and laughing:
| Signal Level | Status |
|---|---|
| ~75% during normal speech | Optimal |
| Red indicators (clipping) | Too hot—reduce gain |
| Below 50% | Consider increasing gain |
Critical: Red clipping indicators show the signal has exceeded maximum recording capacity, causing permanent audio distortion.
Preventing Clipping
- Adjust preamp gains until incoming signals reach healthy volumes without clipping
- Keep gain knobs below three-quarters capacity to maintain signal cleanliness
- For USB microphones without dedicated gain knobs, adjust input levels through system preferences
Advanced Routing: Aggregate Devices
Mac: Creating Aggregate Devices
Combine multiple audio devices using Audio MIDI Setup:
- Open Audio MIDI Setup (Cmd+1)
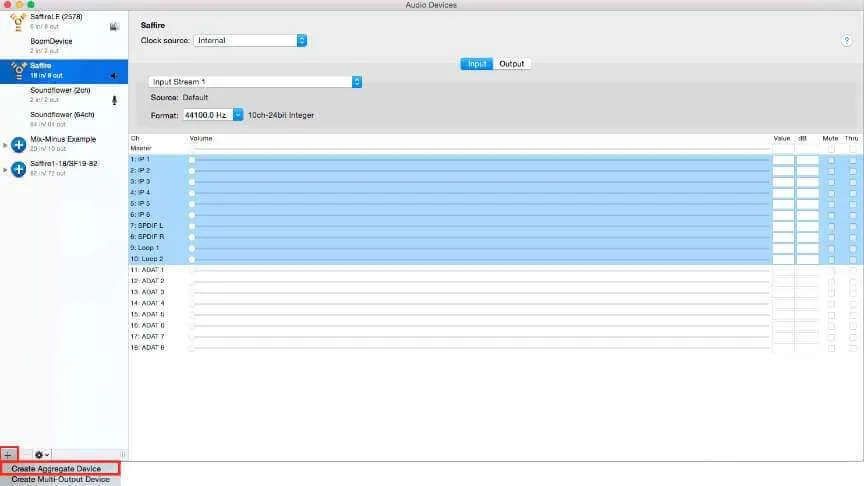
- Click + > Create Aggregate Device
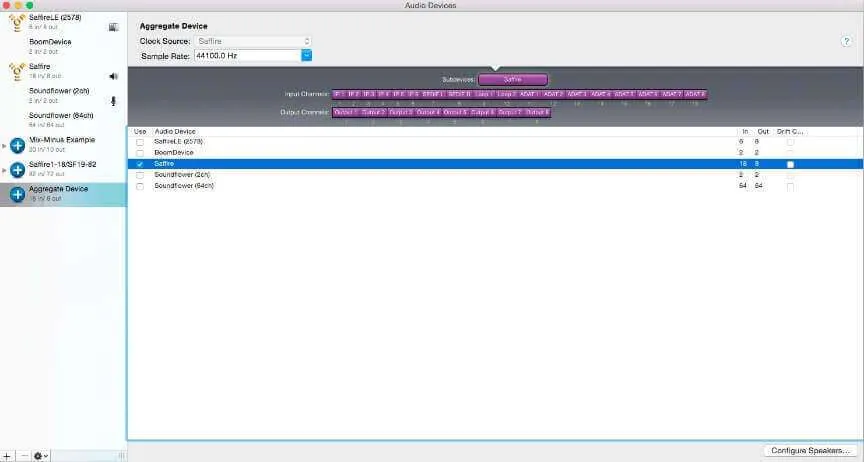
- Select devices with most inputs first
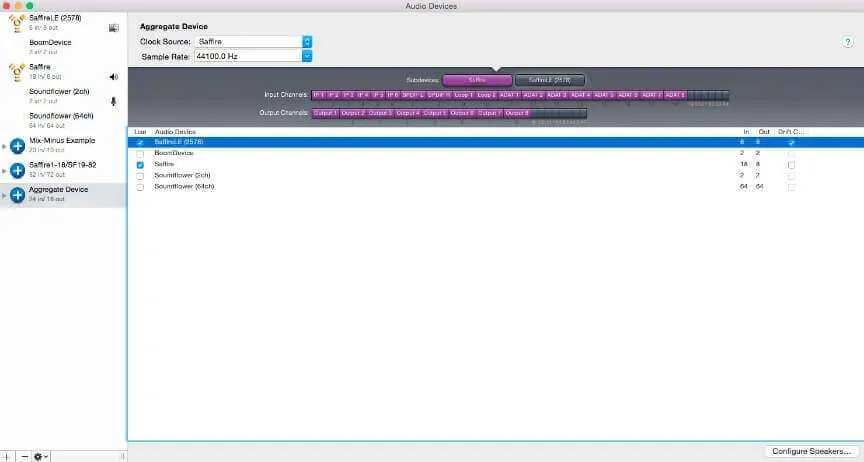
- Add secondary devices
- Rename to reflect input organization
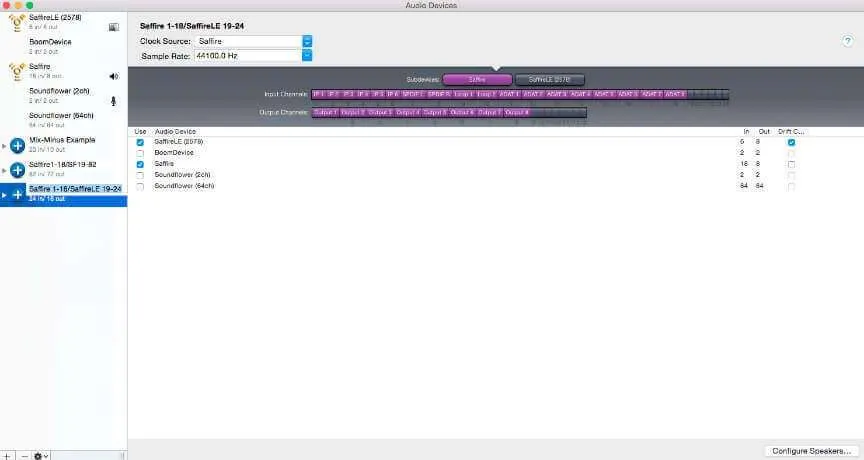
This method allows combining a 2-input interface with USB microphones without purchasing new hardware.
Windows: ASIO4ALL
ASIO4ALL provides Windows-equivalent routing functionality:
- Download and install ASIO4ALL
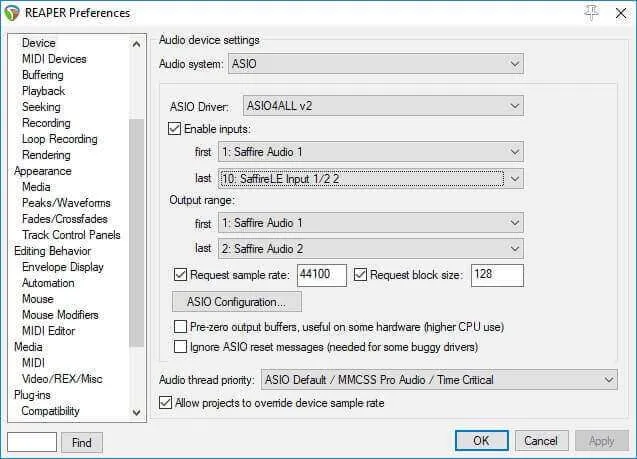
- Change Reaper’s audio system to ASIO
- Select ASIO4ALL v2 as driver
- Open ASIO Configuration and activate desired inputs/outputs
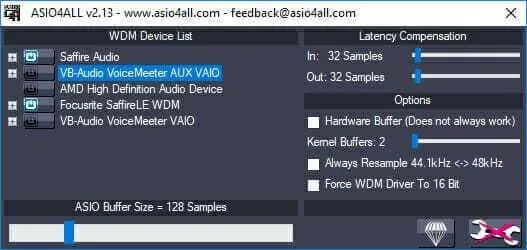
- Set buffering to 128-256 samples for latency reduction
Recording Remote and In-Studio Guests (Mix-Minus)
Mac: Soundflower Setup
Note (2026): Soundflower is no longer maintained and does not run on Apple Silicon Macs. Use BlackHole instead — the routing steps below are identical, with BlackHole 2ch/16ch taking the place of Soundflower.
These free tools enable virtual audio routing for simultaneous remote guest and in-studio host recording:
- Download Soundflower and SoundflowerBed
- Create aggregate device combining physical inputs and Soundflower (2ch)
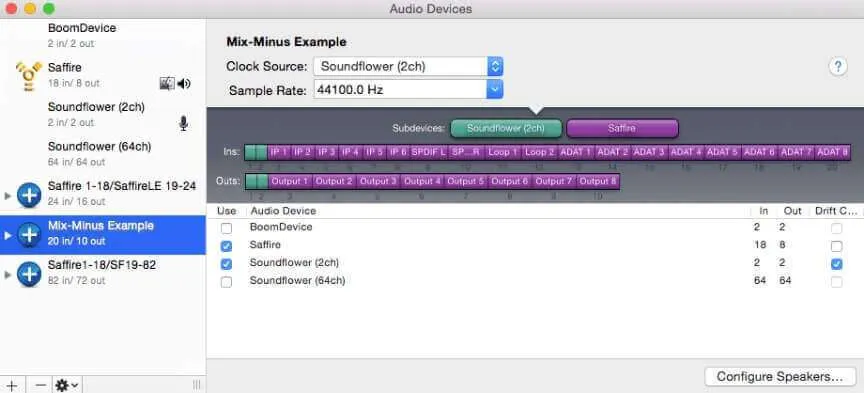
- Set DAW output to Soundflower (64ch)
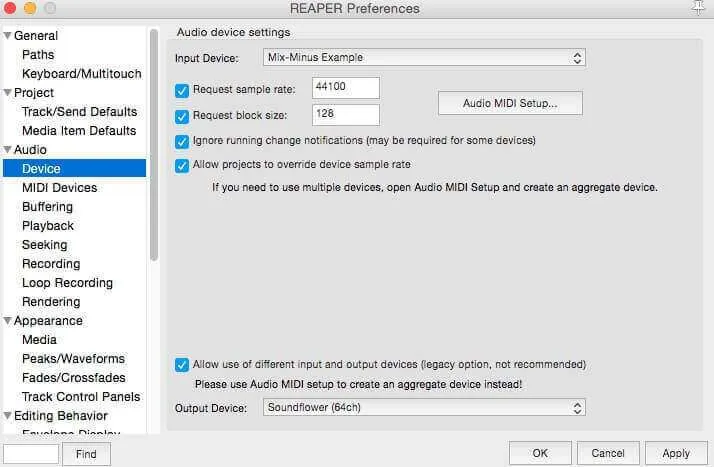
- Route hardware inputs to physical outputs
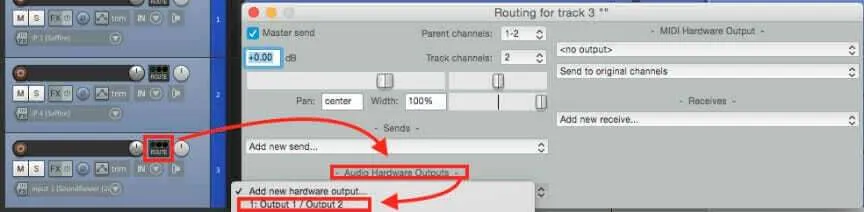
- Configure your call app’s microphone to Soundflower (64) and speakers to Soundflower (2ch)
Windows: Voicemeeter Banana
This free application provides complex routing capabilities:
- Download Voicemeeter Banana
- Assign hardware inputs (interface/USB mics)
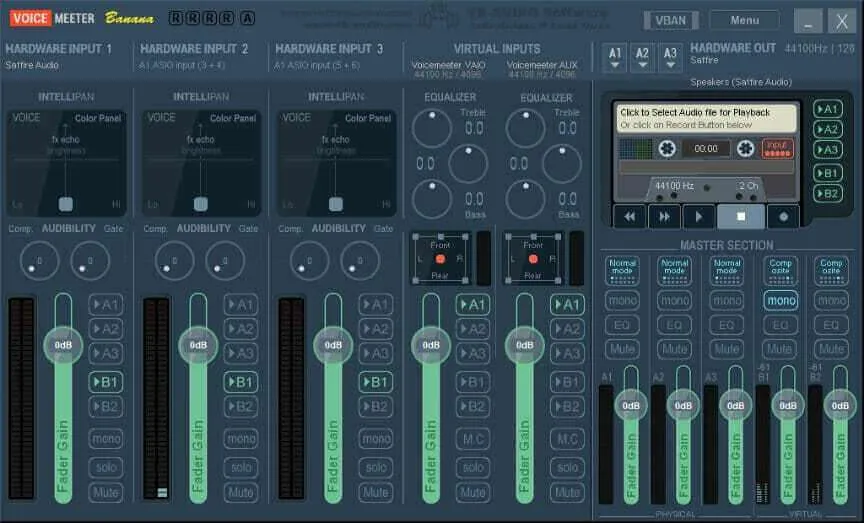
- Route microphones to B1 virtual bus for transmission
- Ensure A1 routing for guest audio playback
- Set composite mode to split virtual buses into separate tracks
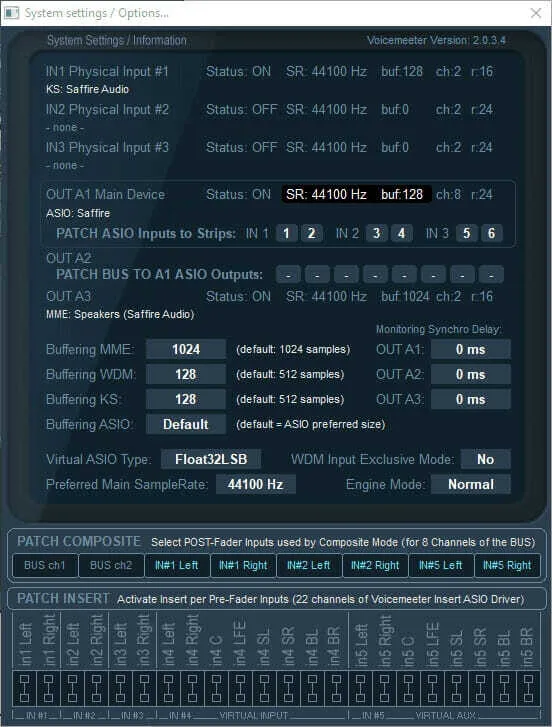
- Configure call app to use VoiceMeeter outputs
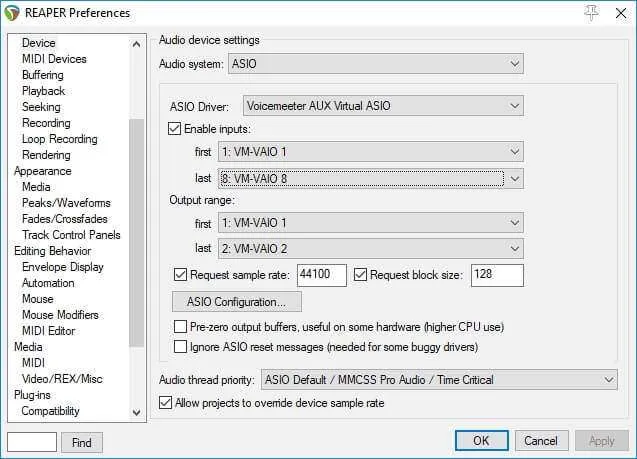
- Set DAW to ASIO with Voicemeeter AUX Virtual ASIO
Key Takeaways
- Room preparation and microphone technique matter more than expensive equipment
- USB microphones suit solo and remote scenarios
- XLR interfaces provide long-term flexibility and adaptability
- Proper gain staging prevents clipping and maintains clean recordings
- Free software tools enable advanced routing without hardware investments
- Test over extended periods to confirm system stability before production recording
Once you have clean recordings, the next step is editing them in Reaper.
Prefer to skip the technical setup? Podigy handles the entire post-production process so you can focus on creating great content.